 Choppa Tools
A professional garage tool wall turns scattered equipment into a controlled, visible workspace. It can hold wrenches, screwdrivers, drills, clamps, and small fasteners within easy reach. More importantly, it supports safer habits and reduces time spent searching through crowded drawers. In this guide, you will learn how to set up a professional garage tool wall with practical planning, reliable storage methods, and careful installation choices.
A successful system begins with the wall itself. Check its condition, locate studs, and confirm that the surface can support loaded cabinets or pegboards. A solid backing panel may be necessary for older drywall. Measure your tools before choosing hooks or shelves. Large cordless drills need deeper support than thin screwdrivers. Keep frequently used tools between shoulder and waist height. Store heavy items lower, where they are easier to lift safely. Leave clear space around electrical equipment and the workbench.
Good organization is visible at a glance. Outlines, labeled bins, and consistent spacing can reveal missing tools quickly. However, perfect layouts are not always practical. I have found that a wall often needs adjustment after real work begins. A hook may be convenient during installation but awkward during repairs. Test the arrangement for several days, then revise it. Secure every component properly, avoid overloading weak hardware, and inspect the system periodically. A professional wall is not merely attractive. It should remain stable, accessible, and useful under everyday garage conditions.
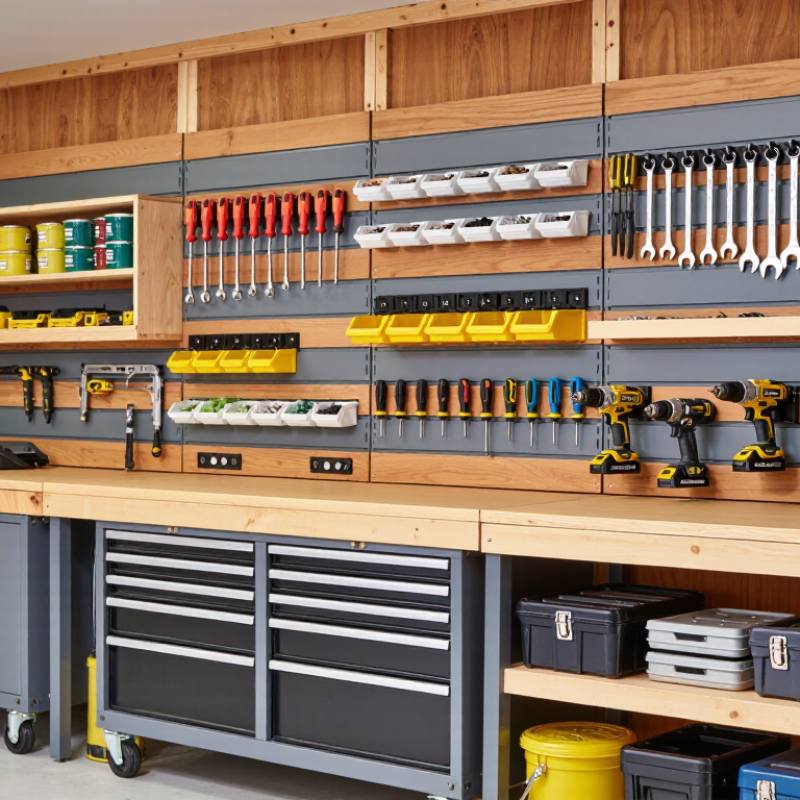
A professional garage tool wall is a visual control system, not merely a pegboard. It places frequently used tools in defined, reachable locations. Common types include slatwall panels, perforated boards, modular rails, shadow boards, and enclosed cabinets. Each suits a different load. Heavy sockets need reinforced hooks or shelves. Small drivers need labeled holders. Parts matter. Use a rigid back panel, load-rated brackets, bins, labels, a work light, and a cleanable surface. Leave clearance around doors, walkways, and electrical equipment. OSHA guidance emphasizes clear, unobstructed passageways, making floor storage a poor choice. The U.S. Bureau of Labor Statistics reported 2.6 million nonfatal workplace injuries and illnesses in private industry during 2023. A tidy wall cannot prevent every injury, but it can reduce searching, awkward reaching, and trip exposure.
5S gives the wall stronger operational value: Sort removes duplicates, Set in Order assigns locations, Shine exposes leaks, Standardize protects consistency, and Sustain requires audits. The Lean Enterprise Institute describes visual management as a method for making abnormal conditions easier to see. Use a photo standard. Mark missing tools immediately. Count retrieval time weekly. The National Safety Council’s Injury Facts 2024 estimated that work injuries cost 167 billion dollars in 2022. This figure does not prove that a tool wall prevents injuries. It does justify disciplined housekeeping. In one workshop, my first layout looked excellent but slowed experienced technicians. The heavy tools were too high. Experience matters more than symmetry. Revise positions after real jobs, not showroom logic.
| Data Dimension | Professional Recommendation or Fact | Practical Setup Details | 5S or Safety Value |
|---|---|---|---|
| Definition | A vertical storage system that organizes hand tools, accessories, and frequently used equipment on a wall-mounted or freestanding panel. | Use a perforated panel, slotted panel, rail system, cabinet back panel, or a combination of these systems. | Makes tools visible, accessible, and easier to return to a defined location. |
| Primary purpose | Reduce search time, protect tools, improve workspace capacity, and support consistent work routines. | Place high-frequency tools between approximately waist and shoulder height whenever possible. | Supports visual management and reduces unnecessary movement. |
| Perforated tool board | A rigid panel with regularly spaced holes for hooks, brackets, bins, and holders. | Suitable for mixed hand tools and layouts that may change over time; verify the panel and hook load ratings. | Clear outlines or labels make missing tools easy to identify. |
| Slotted panel | A panel with horizontal slots that accepts shelves, hooks, holders, and storage bins. | Useful when shelf height and bin position need frequent adjustment. | Improves flexibility while keeping items grouped by function. |
| French cleat system | An interlocking angled-rail system used to hang cabinets, shelves, and custom tool holders. | Install the rail level and fasten it to suitable structural material; distribute loads across the rail. | Allows modular rearrangement and easier removal for maintenance. |
| Wall-mounted cabinet system | Enclosed storage with doors, drawers, or adjustable shelves for protected and secure organization. | Use for small parts, chemicals, precision tools, and items that need protection from dust or impact. | Reduces clutter and limits unauthorized or unsafe access. |
| Panel material | Common choices include formed steel, aluminum, high-density board, and durable polymer panels. | Select material according to tool weight, humidity, corrosion exposure, and expected impact. | A suitable material improves service life and reduces falling-object risks. |
| Essential accessories | Single hooks, double hooks, tool clips, shelves, bins, holders, brackets, labels, and retaining clips. | Match each holder to the tool shape and keep heavy items on reinforced supports. | Prevents tools from being stacked, hidden, or damaged. |
| Tool grouping | Group tools by task, frequency of use, size, or risk level. | Typical zones include measuring, cutting, driving, gripping, fastening, electrical, and cleaning. | Supports the 5S principle of sorting and reduces selection errors. |
| Recommended mounting height | Position the main working zone within comfortable reach for the primary users. | Keep frequently used items around waist-to-shoulder height; place rarely used items higher or lower. | Reduces bending, stretching, and awkward reaching. |
| Wall clearance | Allow enough clearance for tool handles, drawer movement, and safe user access. | Measure the deepest tool and add working clearance before fixing the panel or cabinet. | Prevents blocked walkways, collisions, and interference with vehicles or workbenches. |
| Fasteners and anchors | Use fasteners appropriate for the wall structure, such as masonry anchors, studs, or rated hollow-wall anchors. | Locate studs or structural members when possible; follow the panel and anchor load ratings. | Improves stability and lowers the risk of panel detachment. |
| Load planning | Consider the combined weight of tools, holders, shelves, and future additions. | Place heavier items lower and close to strong mounting points; do not exceed stated capacities. | Improves balance and reduces falling or bending hazards. |
| Labeling method | Use readable labels, silhouettes, outlines, color zones, or numbered locations. | Label shelves and bins consistently, using terms understood by all users. | Supports standardization and makes misplaced tools immediately visible. |
| Electrical tool storage | Store powered tools with cords, batteries, chargers, and accessories arranged separately but visibly. | Keep batteries and chargers dry, ventilated, and away from heat or conductive metal objects. | Reduces trip hazards, cord damage, and improper charging practices. |
| Sharp and hazardous tools | Store blades, cutters, chemicals, and other hazardous items in dedicated holders or controlled cabinets. | Protect cutting edges and keep hazardous substances in suitable, clearly marked containers. | Reduces cuts, spills, contamination, and accidental contact. |
| Setup sequence | Audit tools, sort them, measure the wall, select the system, mount the structure, then assign locations. | Test the layout with frequently used tools before permanently fixing accessories. | Creates a repeatable and evidence-based organization process. |
| Sort | Remove broken, duplicate, obsolete, or rarely needed items from the active tool wall. | Use a temporary review area for uncertain items instead of placing everything on the wall. | Eliminates unnecessary storage and frees usable space. |
| Set in order | Assign every retained tool a specific, visible, and reachable location. | Arrange items according to workflow and frequency rather than appearance alone. | Shortens retrieval and return time. |
| Shine | Clean the panel, holders, tools, and surrounding work area on a defined schedule. | Inspect for oil, metal filings, corrosion, loose hooks, and damaged labels during cleaning. | Cleaning doubles as an inspection and preventive-maintenance activity. |
| Standardize | Document the approved layout using labels, photographs, diagrams, or a location map. | Use the same naming and labeling rules across related work areas. | Makes the correct condition easy to understand and reproduce. |
| Sustain | Review the layout periodically and correct missing, damaged, or misplaced items. | Assign responsibility for inspections and update the layout when work processes change. | Turns organization into a maintained operating habit rather than a one-time project. |
| Inspection frequency | The appropriate interval depends on tool usage, environment, and workplace risk. | Perform quick visual checks regularly and conduct a more detailed review at a defined periodic interval. | Detects loose hardware, corrosion, missing tools, and damaged supports early. |
| Best-fit applications | Home garages, maintenance areas, workshops, service bays, maker spaces, and light industrial workstations. | Choose open storage for speed and visibility, or enclosed storage for security and dust control. | Provides a scalable storage method for different work environments. |
Weigh the heaviest planned tool or case. Add at least a 25% safety margin. A socket case may exceed 25 pounds. Do not rely on appearance alone.
Studs provide stronger support than drywall anchors alone. Common spacing is 16 inches on center, but some walls use 24 inches. Measure every bay. Existing garages can differ.
Use a stud scanner first. Confirm the location with a small pilot hole. A panel spanning two studs usually distributes force better. Guessing is not enough.
No. Use the tested working load instead. A 100-pound panel with four anchors does not automatically support 25 pounds per anchor. Leverage and uneven loading change performance.
Mount heavier tools near structural studs. Keep them low and within comfortable reach. A 40-pound tool should not depend on a light hook. Falling tools can injure someone.
Keep a clear area about 30 inches wide and 36 inches deep in front of it. Do not place shelves, carts, handles, or drawers there. The panel door must open fully.
Mark the floor with contrasting tape. Measure from the panel’s front edge. Store bulky tools beyond the marked depth. Recheck after adding a workbench.
Check anchors, hooks, drawers, and panel movement after installation. Recheck the wall after one week. I once placed a heavy vise too high. It seemed efficient, but daily use felt unstable.
A professional garage tool wall is a structured storage system designed to keep tools visible, accessible, and safely organized. It may include perforated panels, slat surfaces, rails, shelves, hooks, bins, and cabinets, depending on the tools and workflow. To plan how to set up a professional garage tool wall, first review the work area, identify frequently used tools, and group equipment by task. Consider panel strength, anchor capacity, stud spacing, and the combined weight of tools before selecting materials and hardware.
A practical installation begins with securely mounting the panels, dividing the wall into clear work zones, and placing heavy items lower and close to structural supports. Keep required clearance around electrical panels, including at least 30 inches of width and 36 inches of working depth where applicable. Use labels, outlines, and consistent tool locations to support visual 5S organization. Finish by checking fasteners, hooks, shelves, and load distribution regularly so the wall remains stable, efficient, and easy to maintain.
