Choppa Tools
Learning how to calibrate a mechanical torque wrench at home requires patience, accurate measurements, and realistic expectations. A home check can reveal serious drift, but it may not replace certified laboratory calibration. That distinction matters when tightening engine components, brake assemblies, or other safety-critical fasteners.
This guide focuses on practical workshop methods for 2026. It explains how to inspect the wrench, measure the lever length, apply a known weight, and calculate the delivered torque. A sturdy bench, a calibrated mass, a steel tape, and a clear calculator screen are useful. The wrench should remain level while the weight hangs steadily from the handle. Small details matter. A few centimeters can change the result.
Do not trust a single reading.
Several repeated tests should be performed at low, middle, and high settings. The click mechanism may behave differently across its range. Friction, worn springs, inaccurate weights, temperature, and a slightly bent handle can affect the result. Even the measuring point can create error. Manufacturer instructions and ISO 6789 guidance should shape the procedure, especially for professional work. If the wrench shows inconsistent clicks, visible damage, or large deviations, stop using it and seek a qualified calibration service. Home testing is useful for learning and screening. It is not a license to guess. A careful record of dates, settings, weights, readings, and corrections makes the process more trustworthy, while also exposing where the method remains imperfect.
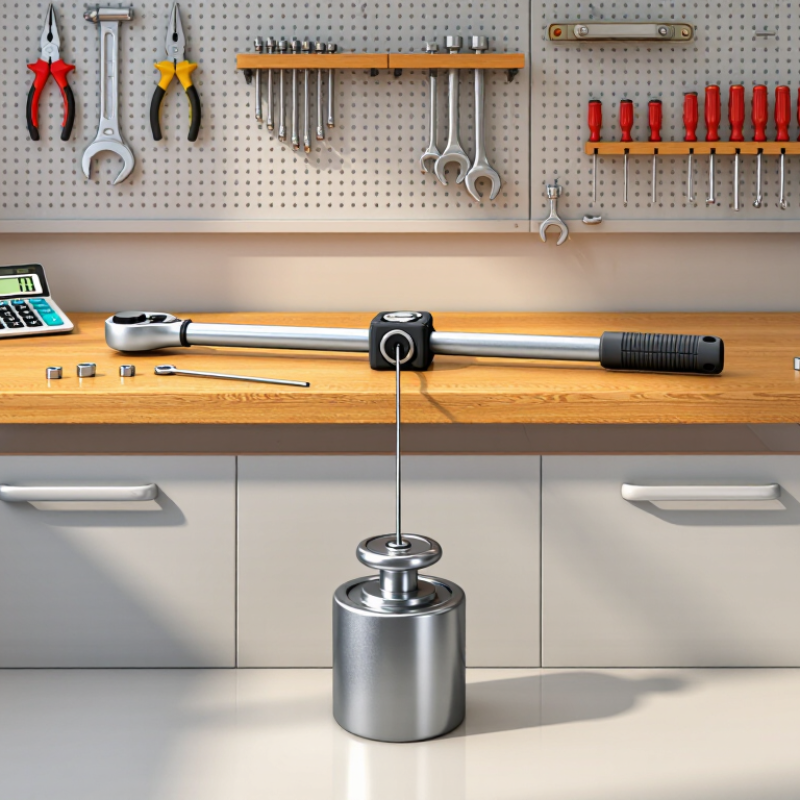
A mechanical torque wrench measures turning force through a spring, lever, and calibrated scale. Its accuracy can change after drops, long storage, or repeated use near maximum capacity. ISO 6789:2017 commonly permits about ±4% deviation for many Type II wrenches between 20% and 100% of rated capacity. That tolerance is not a guarantee for every tool. Check the tool’s certificate and class.
A practical home check uses a rigid vise, a measured lever arm, and certified weights. Torque equals force multiplied by distance. For example, a 20-kilogram mass produces about 98.1 newton-metres at a 0.5-metre lever, using standard gravity of 9.80665 m/s². Measure from the drive center to the force point. Keep the wrench level, pull slowly, and test around 20%, 60%, and 100% of its range. Repeat each point three times.
Small details matter. Do not jerk the handle. Do not use uncertain household objects as “calibrated” weights. NIST Technical Note 1297 stresses that measurement results need traceable inputs and stated uncertainty. A home test can reveal serious drift, but it cannot replace laboratory calibration.
My own weak point is assuming a neat calculation means a reliable result. It does not. If readings differ widely, stop using the wrench for critical fasteners and seek an accredited calibration service.
Home calibration begins with a stable bench, good lighting, and enough clearance for controlled movement. Gather a torque tester, calibrated reference weights, a square-drive adapter, and a padded bench vise. Use weights with documented accuracy. Unknown weights weaken your results.
Keep the wrench horizontal and support its handle without restricting movement. The applied force should remain perpendicular to the handle. Remove loose objects from the floor and keep children away. Wear eye protection. Never hang weights from unstable furniture. It sounds obvious, but rushed setups create avoidable hazards.
ISO 6789-2:2017 requires calibration procedures to address measurement uncertainty and traceability. NIST Technical Note 1297 identifies a coverage factor of 2 as approximately 95 percent confidence. That figure does not make an improvised setup professional-grade. It only explains how uncertainty may be reported.
Mark the test position with removable tape and record room temperature, tool setting, load point, and readings. Let the wrench rest before testing. I would repeat each setting at least three times, then compare the spread. My own weak point would be assuming a single smooth click proves accuracy. It does not. A home result is useful for screening, not replacing documented laboratory calibration.
Before calibrating a mechanical torque wrench, inspect its condition carefully. A dirty adjustment thread can create false torque readings. Wipe the handle and drive square with a clean, lint-free cloth. Remove loose debris, but do not force trapped grit deeper into the mechanism.
Check the ratchet for skipped teeth, rough movement, or unusual play. Examine the drive square for rounding, cracks, and visible distortion. The scale should remain readable, with no faded numbers or a loose pointer. Turn the adjustment handle through its range. It should move smoothly, without tight spots. Return the setting to the lowest marked value after inspection. This reduces unnecessary spring stress.
ISO 6789:2017 defines torque-tool calibration using controlled loading points, commonly 20%, 60%, and 100% of rated capacity. That procedure assumes the tool is mechanically sound. NIST Technical Note 1297 also identifies repeatability, resolution, and applied-force variation as important uncertainty sources. A wrench that was dropped may still look perfect. That is the dangerous part. I would record its condition, adjustment setting, and any damage before testing. My first inspection was too visual; I nearly missed a stiff lock collar. Do not calibrate a wrench with cracked parts, a bent drive, a frozen adjustment system, or an unreadable scale. Send it for qualified evaluation instead.
How to Calibrate a Mechanical Torque Wrench at Home in 2026?
Calibrating a mechanical torque wrench requires a stable setup and careful measurements. Let the wrench rest for several hours indoors before testing. Check the handle, square drive, and scale for damage. Set the wrench to a low value, then release its mechanism several times. This helps distribute internal lubricant.
Secure the square drive horizontally, without gripping the handle. Hang a known mass from the handle at a measured distance from the drive center. Keep the mass directly below the handle. Torque equals force multiplied by distance. For example, a 10-kilogram mass creates about 98.1 newtons of force. At 0.5 meters, it produces approximately 49.1 newton-meters. Apply the load slowly until the wrench clicks. Record the setting and repeat the test three times at low, middle, and high values.
Average the readings and compare them with the calculated torque. A simple table exposes inconsistent clicks or measurement errors. Check the hanging point again. A few millimeters can change the result. My own setup would not be treated as laboratory calibration, because homemade fixtures introduce uncertainty. If the error exceeds the stated tolerance, adjust the wrench only according to its service instructions. Otherwise, send it to a qualified calibration laboratory. Never force the handle past its rated range. Keep the records, including mass, distance, temperature, and repeated readings.
How to Calibrate a Mechanical Torque Wrench at Home in 2026?
Verifying calibration matters more than simply adjusting the handle. Set the wrench to a familiar value, then compare it with a reliable torque tester. A certified tester provides stronger evidence than a homemade weight setup. If using a measured weight and lever, keep the wrench perfectly horizontal. Measure the lever length from the drive square to the weight’s center. Even a small measuring error changes the result.
Repeat each test at low, middle, and high settings. Record three readings for every setting. Let the mechanism rest between tests. My first check would be too rushed if I tested only once. A single result can hide friction, wear, or a slipping internal spring. If readings vary noticeably, stop using the wrench for critical fasteners. Professional calibration is the safer choice, especially when traceable accuracy is required.
Tips: Store the wrench at its lowest marked setting, not below it. Keep the handle clean and dry. Avoid using it as a breaker bar. After use, release the load slowly. Check the locking mechanism before every measurement. Record the date, settings, and results in a simple log. Calibration can drift after a drop, overload, or long period of storage. Recheck it regularly, even when it appears normal.
This home-verification example compares target torque settings with measured readings from a mechanical click-type torque wrench over a 20–100 N·m working range. The percentage error is calculated as (measured torque − target torque) ÷ target torque × 100. A commonly used reference for many torque wrenches is ±4% accuracy across the specified operating range, but the wrench’s own technical specification should always take priority.
The example readings remain within the ±4% reference band. For better confidence, repeat each setting several times, record the average, release the spring tension to the manufacturer’s storage setting after use, and arrange professional calibration if results move outside the permitted tolerance.
It measures turning force through a spring, lever, and calibrated scale. The reading shows torque applied to a fastener. Its accuracy may change after drops, storage, or heavy use.
Yes, you can perform a practical accuracy check. Use a rigid vise, a measured lever distance, and certified weights. This check reveals serious drift. It does not replace laboratory calibration.
Use a stable fixture, known masses, and a ruler or measuring tape. Measure from the square drive center to the loading point. Keep the wrench horizontal. Avoid uncertain household objects as weights.
Torque equals force multiplied by distance. A 10-kilogram mass produces about 98.1 newtons of force. At 0.5 meters, the result is approximately 49.1 newton-metres. Small distance errors matter.
Test near 20%, 60%, and 100% of the wrench’s rated range. Repeat every point three times. Record each click and setting. Three readings expose inconsistent results.
Hang the mass directly below the handle. Pull or load slowly, without jerking. Keep the wrench level during testing. Do not grip the handle in the vise.
Let the wrench rest indoors for several hours. Inspect the handle, square drive, and scale for damage. Set a low value and release the mechanism several times. This may distribute internal lubricant.
Stop using the wrench for critical fasteners. Check the loading point, distance, and mass again. A few millimetres can change the result. My own weak point is trusting neat calculations too quickly.
Send it to a qualified calibration laboratory when error exceeds its stated tolerance. Professional testing provides traceable measurements and documented uncertainty. A home fixture adds uncertainty. That part is easy to underestimate.
Adjust it only when the service instructions clearly permit adjustment. Never force the handle beyond its rated range. Keep records of mass, distance, temperature, settings, and repeated readings. Good records help reveal gradual drift.
Learning how to calibrate a mechanical torque wrench at home begins with understanding that accuracy depends on both the tool’s condition and the testing method. Prepare a clean, stable workspace with suitable weights, a secure anchor point, a measuring reference, and basic protective equipment. Before testing, inspect the wrench for damage, corrosion, loose components, or a malfunctioning adjustment mechanism. Make sure the scale is readable, the handle moves smoothly, and the tool is set to its lowest setting when stored or prepared.
During calibration, secure the wrench carefully, apply force gradually at the correct handle position, and compare the measured output with the selected torque setting. Repeat the test at several points within the wrench’s working range to identify inconsistent readings. If the results are outside the permitted tolerance, avoid relying on the wrench for critical fastening until it has been professionally serviced. Finally, record the results, release tension after use, store the tool properly, and periodically recheck its accuracy to maintain dependable performance.
